Introduction

Crito is a premium WordPress landing theme designed for Startup, SaaS Business, App, Softwares etc. We have used the most popular WordPress page builder, Elementor to create Crito pages. It was built based in the latest trends in design style and typography choices.

Crito is fully compatible with latest version of Wordpress.

Upload and Activating theme

Read the documentation to learn about installing and activaing our theme.


  1. Navigate to Appearance → Themes in your WordPress admin dashboard
  2. Click the Add New button at the top of the page then go for the Theme Upload option.
  3. For the file upload, pick Theme Files / Crito.zip in the theme package downloaded
    from ThemeForest and click Install Now.
  4. Click Activate once the upload has finished and you're ready for the next step: Installing the Plugins.

Installing Plugins


Right after the theme was activated, a notification at the top of the screen will suggest to continue with the installation of the plugins.

  1. Click Begin installing plugins and select all the plugins in the list.
  2. Activate the Plugins you just installed.

Dummy Data Import


    Onc click demo import

    At first you need to import the "Initial Setup". Then just click on Import button and your demo site should be ready.


    Import options
  1. Initial Setup: To get one home page, blog & contact pages import Initial setup
  2. Homepages Setup: To get another home pages import Homepages
  3. Inner pages Setup: To get all inner pages import Inner pages


  4. Manual import.

    If somehow the One click demo import fails to import your pages then you can try importing demo content manually.

    1. From your Wordpress admin dashboard, navigate to Tools → Import → WordPress.


    2. Select the theme dummy data .xml file located in demo-data/(homepage name).xml

    3. Wait until you see the message Have Fun

Homepage & Blog Setup


To setup the blog page, in your WordPress admin panel, navigate to Settings → Reading.

Assuming you already have a page named "Blog", for the Front page display, select "A static page" and choose your "Blog" page as the Posts page. This is what you should be seeing on your screen from left side.

Assuming you already have a page named "Home", for the Front page display, select "A static page" and choose your "HOME page as the home page. This is what you should be seeing on your screen from left side.

Mega Menu Setup


    1. First you have to create a mega menu from Theme Builder. Then go to the menu item and select the mega menu from Select mega Menu Option.

    2. Navigate to Appearance > Menus.
    3. Note: If you need to hide any item then you can simply check the Hide this menu then it will be Hidden.

    Megamenu heading

    Now you can set/change mega menu heading style from Megamenu settings in Elementor Widget

Crito Theme Options


  1. Brand Settings

    From "Theme options" > "Branding" you can change your theme branding elements.


  2. Typography

    From typography settings, you can control your font size easily.


  3. Brand Colors

    From brand Colors settings, you can control your brand color easily.


  4. Sticky header

    From sticky header settings, you can control your menu sticky.


  5. Blog

    From blog settings, you can control your blog meta & layout.


  6. 404

    From 404 settings, you can control your 404 page view.

Theme Builder setup

Crito has advanced Header,Footer, Megamenu options which will help you to control different header and footers in different pages easily Also theme builder has Custom post details page option.


  1. Include Exclude Header & Footer

    You can Include/Exclude your header/footer on specific apages or Entire Website from the metabox option..


  2. Custom Post Details page

    You can add your custom post details page design from here. You just need to make the design here and and place text editor widget and show page cotent switcher then the content show, which on you design on you post by guttengerg editor.


    When you Edit your post then found this page


    When you Edit with elementor your custom post details page from theme builder then found this page


Crito Widgets


  1. Portfolio

    • Laoyout


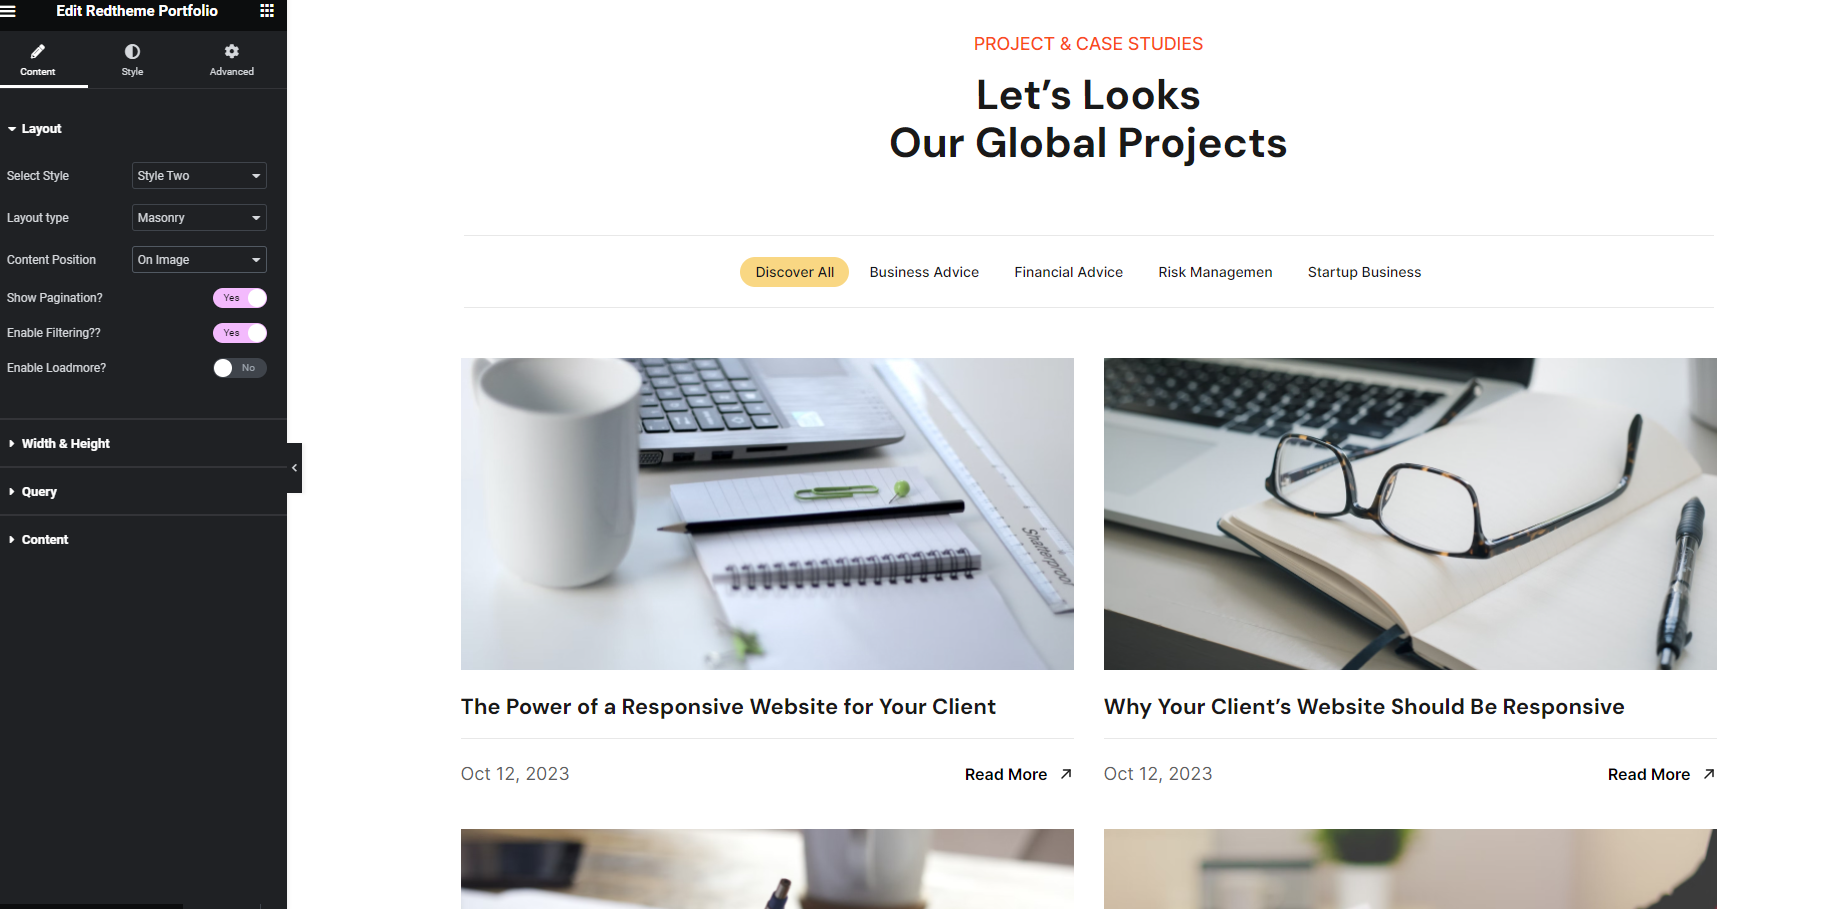
      Layout Type: From Layout Type you can set the layout mode. Currently there is 2 modes. One is Masonry Other is Normal

      Content Position: From Content Position you can change the content position. Currently there is 3 Positions.

      Enable Filtering: Using this option you can enable the filtering feature.

      Enable Loadmore: Using this option you can enable the Ajax loadmore button feature.


    • Width & Height


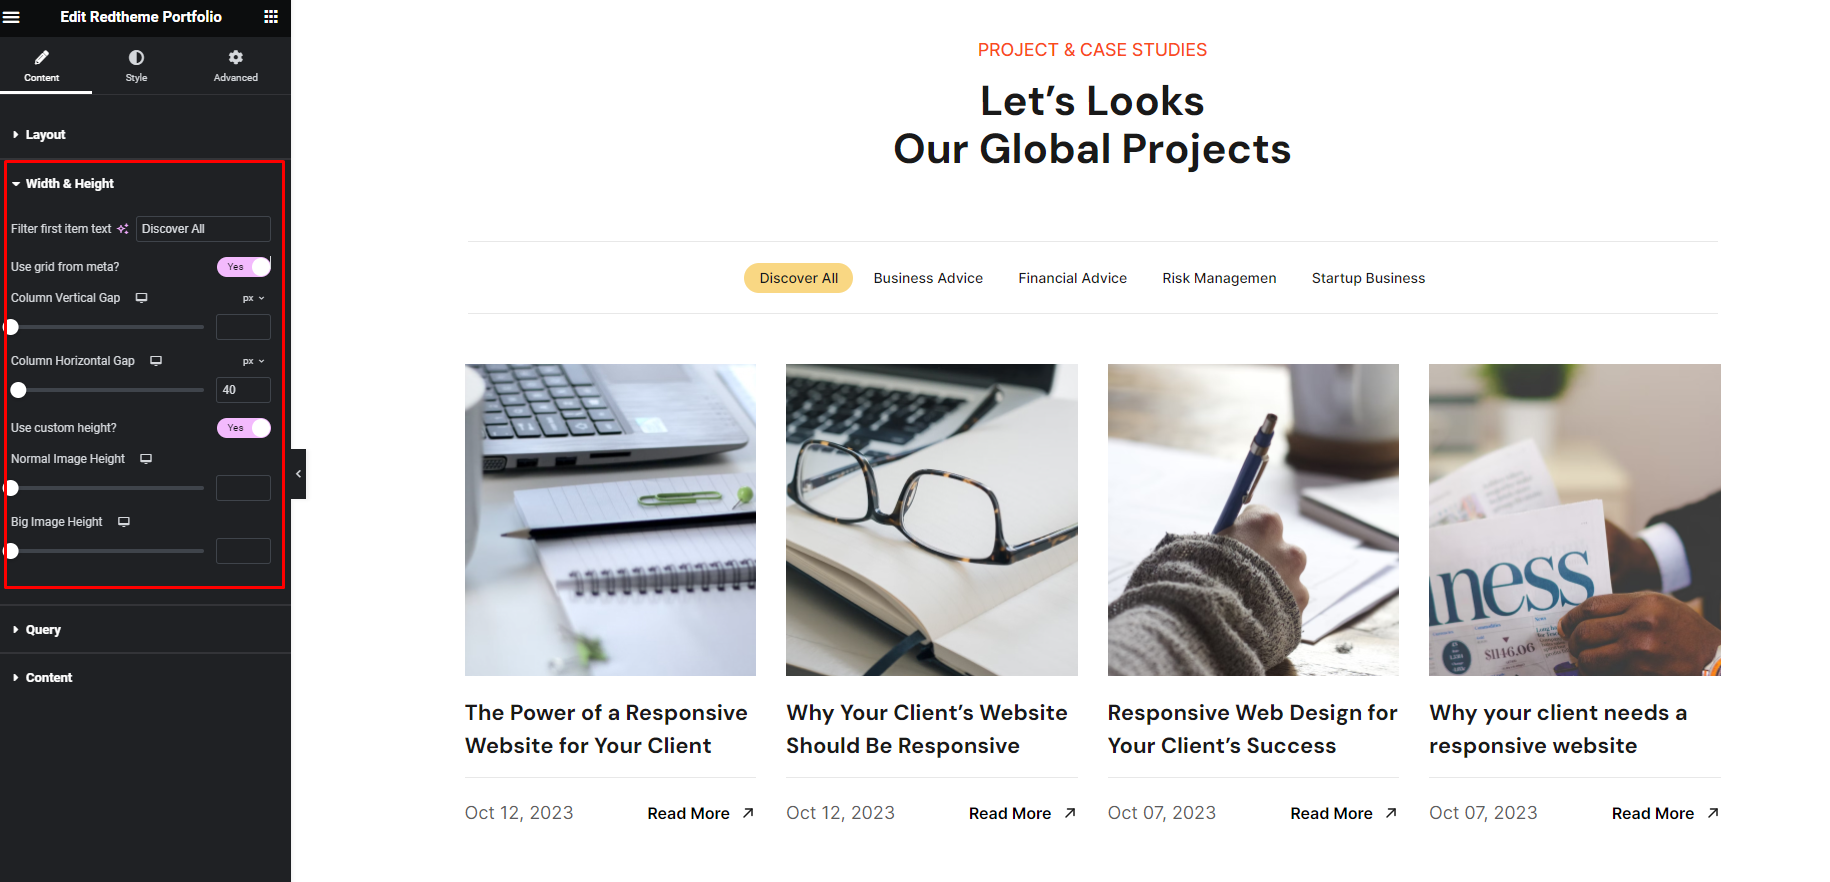
      Use grid from meta: Using this option you can swap the grid from the Portfolio metaboxes

      Post grid: Using this option you can change the column.

      Column Vertical Gap: Using this option you can adjust the column vertical gap.

      Column Horizontal Gap: Using this option you can adjust the column Horizontal gap.

      Use custom height: Using this option you can adjust the image height.

      Normal Image Height: Using this option you can adjust the Normal image height.

      Big Image Height: Using this option you can adjust the Big image height.
      NOTE: If you want to adjust the big image then you need to set that portfolio as big image from Portfolio Options Meta


    • Query


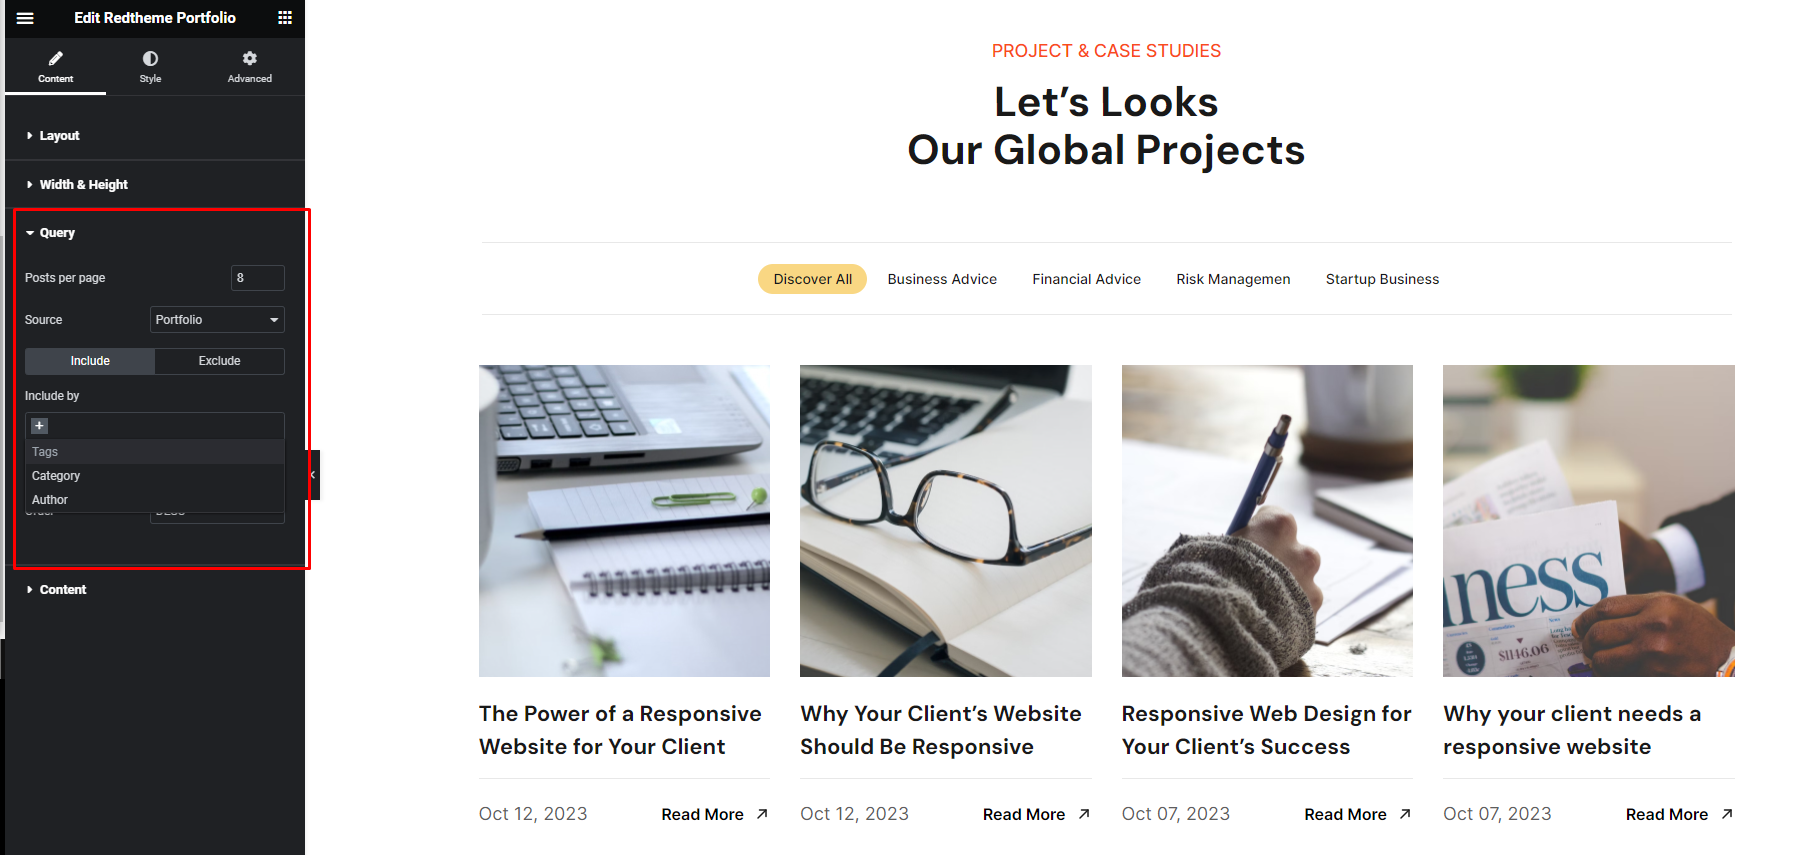
      Posts per page: Using this option you can set how many items will show.

      Posts per page: Using this option you can change the source. Currently there are 3 sources. Portfolio for the showing default query. Manual Selection for select item manually and Related For the related items matched with category/categories

      Include Exclude Tab: Using this option you can Include/Exclude items by categorys, tags, author..

      Order By: Using this option you can orderby.

      Order: Using this option you can set the order.


    • Content


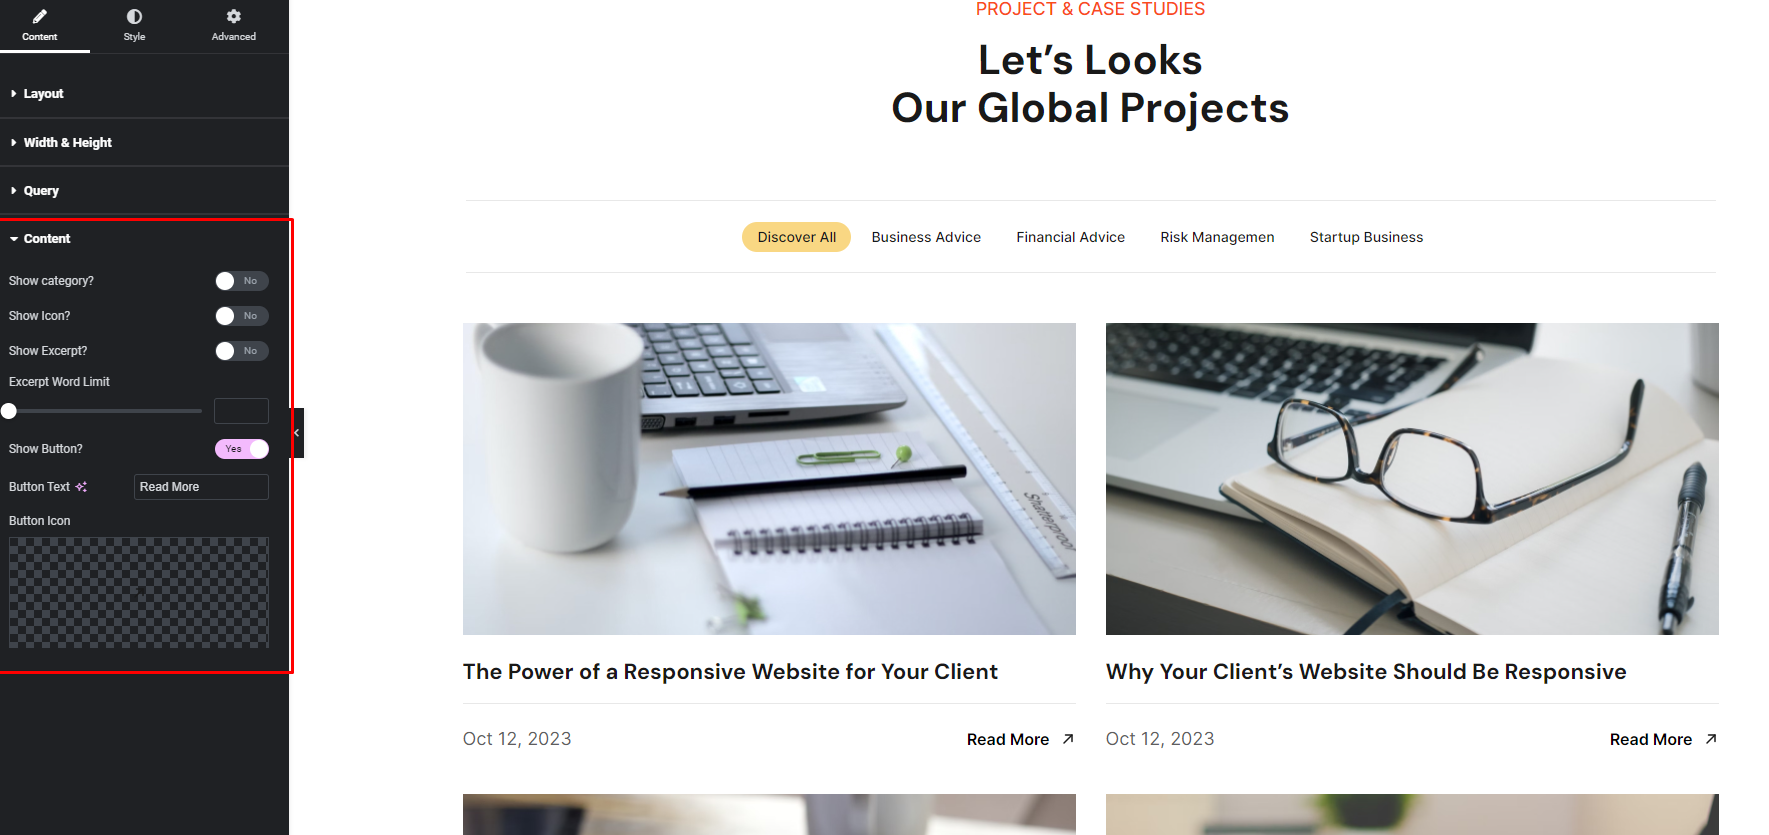
      Show category: Using this option you can show/hide the category.

      Show Title Icon: Using this option you can show/hide the Title icon.


Updating Crito


To updating the theme there are 2 ways.

  1. When there's a new update released you will get notification on your dashboard. You can simply update from there.

  2. When there's a new update available on Themeforest. Download the new updated theme. Then extract and upload new version from your dashboard Appearance → Themes. Then activate the theme. During this process, no data will be lost. Because all pages and posts data saves in Database.

    After activating new theme, you needs to check that if there's any update available for Crito theme support plugin as well by visiting this page Appearance → Installed Plugins.

Support

About our support (supports we provide and supports we don't)


We provide Basic Support for:

  • Responding to questions or problems regarding the theme item and it's features.

  • Fixing bugs and reported issues.

  • Providing updates to ensure compatibility with new software.

Our Basic support doesn't but Premium Support includes:

  • Customization and installation services.

  • Support for third party software and plug-ins.

Basic Support Check

Things to consider before seeking support:

  • Make sure your question is a valid Theme Issue and not a customization request.

  • Make sure you have read through the documentation and any related video guides before asking support on how to accomplish a task.

  • Make sure to double-check the theme FAQs.

  • Try disabling any active plugins to be sure your issue isn't any conflict with a plugin. And if it is, this way you can let us know.

  • If you have customized your theme and now have an issue, back-track to make sure you didn't make a mistake. If you have made changes and can't find the issue, please provide us with your changelog.

  • Make sure to state the name of the theme you are having issues with when requesting support via ThemeForest.

Premium Support Check

If your problem criteria doesn't meet basic support coverage, you can simply reach out to us, And we will give you a quote to fix your issue, or setup your branding or do your customization. After meeting the premium support check and ensuring it's a premium support offered criteria, Please email to: help.redindex@gmail.com with subject "Premium Support Request".

Premium support: We provide premium support for -

  • Customization request.

  • Installation service.

  • Custom Slider Addition

  • Custom font generate and setup

  • Color and Branding customization according to your need

  • And much more..

For premium support we will get back to you within 12 hours. Let us save your time alongside saving you from your frustation!

Thanks for choosing RedDevs!